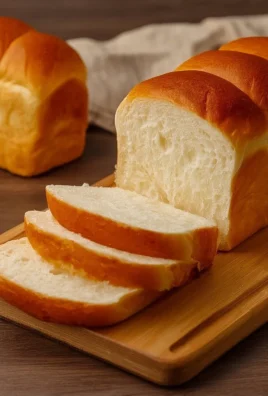
There’s something truly special about the aroma of freshly baked bread wafting through your home. That golden-brown crust, slightly crispy to the touch, gives way to an incredibly soft and tender interior. Every bite is a warm embrace, subtly sweetened by honey with just a hint of saltiness. It’s one of those simple, yet heavenly pleasures that graces my kitchen on lazy Sundays or whenever I need a comforting fix.
I often find myself making this bread when friends come over for a cozy dinner, or when I just want to treat myself to something wholesome and delightful. Honestly, there’s no comparison to the satisfaction of cutting into a loaf that you’ve crafted with your own hands.
Making this bread comes together surprisingly fast. You’ll love how you can have warm, homemade bread ready while enjoying the process, whether you’re kneading it by hand or letting a mixer do the work. Plus, it’s so versatile! Perfect for sopping up soups, slathering with butter, or even as the base for scrumptious sandwiches. And if there are any leftovers—which is often a miracle in my house—they make fantastic toast or croutons!
Why I Love Homemade Bread
Homemade Bread is a true winner at my table! Not only is it incredibly easy and undeniably delicious, but it hits that sweet spot between comfort food and a fantastic way to impress guests. The flavor profile is wonderfully balanced: sweet, savory, and satisfying all at once! Plus, each slice boasts a fresh, warm aroma that can turn a simple meal into a delightful feast.
Homemade Bread Ingredients
The magic of this Homemade Bread truly lies in the harmony of its ingredients. Bread-making might sound intimidating, but don’t worry about exact measurements just yet; those are all in the recipe card for you!
Core Ingredients and Their Roles
- 2 CUPS WARM WATER (105-115 DEGREES): This is the lifeblood of our dough! The warmth gets the yeast all bubbly and lively.
- 1 TABLESPOONS ACTIVE DRY YEAST: These little gems pack a mighty punch, giving our bread that beautiful rise and fluffy texture!
- 1/4 CUP HONEY OR SUGAR: A touch of sweetness is essential for flavor and helps our yeast thrive.
- 2 TEASPOONS SALT: A crucial player that enhances the overall flavor of the bread while controlling yeast fermentation.
- 2 TABLESPOONS OIL (CANOLA OR VEGETABLE): This helps keep the bread tender and moist, adding richness that just can’t be beat.
- 4 – 5 1/2 CUPS ALL-PURPOSE OR BREAD FLOUR: The backbone of our bread! Flour gives structure and chewiness, so it’s important to get this right for that delightful crust.
Substitutions and Tips
Need a swap? If you’d like to try something different, here are some easy alternatives and flavor variations! You can use brown sugar instead of honey, though it won’t be quite as rich. Also, if you’re out of standard flour, whole wheat flour works just fine—just expect a denser loaf. If you’re feeling adventurous, toss in some herbs or seeds for an aromatic twist.
This dough is forgiving! Should you find it too sticky, sprinkle in a little more flour until you reach that lovely elastic consistency. And remember to proof your yeast; if it doesn’t foam up, it’s back to the drawing board!
Kitchen Tools You’ll Need
- Large mixing bowl (or stand mixer)
- Measuring cups and spoons
- Wooden spoon or spatula
- Plastic wrap or a clean dish towel
- 9×5” bread pans (2)
- Cooking spray
- Wire cooling rack
How to Make Homemade Bread
Let’s dive into creating this fluffy Homemade Bread. I’ve broken down the process into simple steps. Follow along, and you’ll have a delicious loaf in no time. We’re aiming for that golden crust and tender, airy inside that makes every slice count!
Prepare the dough:
In a large bowl or stand mixer, add the yeast, water, and a pinch of your chosen sugar or honey. Allow to rest for 5-10 minutes until foaming and bubbly. (This is called “proofing” the yeast to make sure it’s active. If it doesn’t foam, the yeast is no good, and you need to start over with fresh yeast.)
Mix in the sweet and savory:
Add the remaining sugar or honey, salt, and oil, along with 3 cups of flour. Gently mix these together until everything is combined beautifully.
Adjust the consistency:
Stir in another cup of flour and mix until well-integrated. Keep the mixer running and sprinkle in more flour, ½ cup at a time, until the dough begins to pull away from the sides of the bowl. You want your dough to be smooth, elastic, and just slightly tacky to the touch—not too sticky!
Knead the dough:
If using a stand mixer, mix on medium speed for 4-5 minutes. Alternatively, turn out your dough onto a lightly floured surface and knead by hand for 5-8 minutes. This step is key for building that lovely structure!
First rise:
Grease a large bowl with oil or cooking spray and place the dough inside, turning to coat. Cover with a dish towel or plastic wrap. Allow to rise in a warm place until doubled in size, about 1 ½ hours—just the time for a little nap!
Shape the loaves:
When the dough is ready, punch it down gently to remove those pesky air bubbles. Divide it into two equal portions. Shape each piece into long logs and place them into the greased loaf pans.
Second rise:
Cover the pans with a lightweight dish towel (or spray two pieces of plastic wrap with cooking spray and lay over the pans). Let the dough rise again for about 45 minutes to one hour, or until it’s risen a glorious inch above the loaf pans.
Bake to perfection:
Preheat your oven to 350°F. Bake the bread for about 30-33 minutes, or until the tops are golden brown. When it’s done, give the top of a loaf a gentle tap; it should sound hollow!
Cool and enjoy:
Invert the loaves onto a wire cooling rack. Brush the tops with butter—yes, please!—and allow to cool for at least 10 minutes before slicing.
Storage tips:
If you happen to have leftovers (which is rarely the case in my home!), store them in an airtight container or bag for 2-3 days at room temperature, or up to 5 days in the refrigerator.
Tips for Success
- Make sure your water is not too hot when activating your yeast; aim for a comfortable warmth!
- Don’t skip the proofing; it ensures your yeast is alive and kicking for a great rise.
- Adjust flour amounts as needed; the humidity and flour variance can affect the needed amount.
- Waiting for the dough to rise is a lesson in patience—don’t rush it! The results are worth it.
- Always let bread cool completely before slicing; otherwise, you risk a gummy interior.
Serving Suggestions
- Serve warm with a pat of butter and a drizzle of honey for a heavenly snack.
- Enjoy slices as the base for an elegant sandwich filled with your favorite meats and cheeses.
- Pair it with soups or stews to soak up every last drop.
- Toast slices for a crunchy breakfast topped with avocado or jam.
- For a touch of elegance, serve alongside a vibrant salad for a delightful meal.
Remember, making homemade bread is not only about the final product, but about the love and care you put into each step of the process. Happy baking!