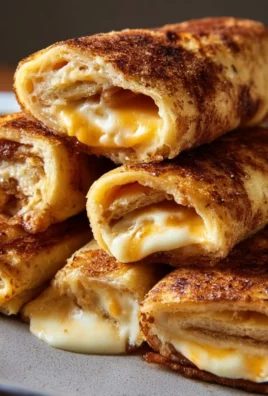

There’s something truly special about biting into a warm, cheesy delight that’s golden brown on the outside and packed with gooey goodness on the inside. My Grilled Cheese Roll Ups are just that! They are wonderfully indulgent, with a crispy exterior and a melty center that hugs each roll. I often whip these up when I’m feeling nostalgic or when friends come over for a cozy movie night—they always bring smiles to faces and warmth to hearts!
These delightful rolls come together surprisingly fast, making them perfect for busy weeknights or spontaneous gatherings. You can easily customize these cheesy treats to suit any palate, and let’s just say, they’re a crowd-pleaser that disappear quicker than I can make them! Don’t worry if you have leftovers—just reheat them for a quick snack later!
WHY I LOVE GRILLED CHEESE ROLL UPS
Honestly, Grilled Cheese Roll Ups hit that sweet spot between comfort food and fun finger food. They’re incredibly easy and undeniably delicious, making them a true winner at my table. Whether enjoyed as a quick lunch or served at a party, these little beauties will have your guests raving about their next bite!
GRILLED CHEESE ROLL UPS INGREDIENTS
The magic of this Grilled Cheese Roll Ups recipe truly lies in the harmony of flavors and textures. Each component plays its part to create that comforting, familiar taste we all know and love. Don’t worry about exact measurements just yet; those are all in the recipe card for you!
Essential Components
- BREAD: 8-10 slices of soft white sandwich bread (crusts removed). The softer and fresher the bread, the easier it will be to flatten and roll without tearing. Wonder Bread or similar generic white bread works exceptionally well due to its pliability.
- CHEESE: 8-10 slices of your favorite melting cheese. Classic choices include:
- Cheddar Cheese: Provides a sharp, tangy flavor. Medium or sharp cheddar works beautifully.
- American Cheese: The ultimate melter, offering a creamy, classic grilled cheese taste.
- Monterey Jack: Mild, buttery, and melts exceptionally well.
- Colby Jack: A delightful swirl of Colby and Monterey Jack, offering mild flavor and great meltability.
- Provolone: Offers a slightly more complex, mild, and smoky flavor with excellent stretch.
- BUTTER: 4-5 tablespoons of unsalted butter, softened to room temperature or melted. This is crucial for achieving that golden-brown, crispy exterior.
- OPTIONAL SEASONINGS:
- Garlic Powder: A sprinkle adds a lovely aromatic touch.
- Paprika: A pinch can add a hint of color and smoky flavor.
- Dried Italian Herbs: A small sprinkle brings a Mediterranean flair.
SUBSTITUTIONS AND TIPS
Need a swap? You can switch out the bread with whole wheat or even gluten-free varieties if necessary (though it won’t be quite as traditional). If you’re feeling adventurous, try using different cheeses like Pepper Jack for a spicy twist or go vegan with plant-based cheese alternatives!
Make sure to flatten the bread enough; this step is key to a tight roll and crispy results. Remember, you can keep it simple or jazz it up with those optional seasonings—you really can’t go wrong!
KITCHEN TOOLS YOU’LL NEED
- Rolling pin (a wine bottle works in a pinch)
- Non-stick skillet or frying pan
- Tongs (for easy flipping)
- Butter knife
- Flat surface for rolling
HOW TO MAKE GRILLED CHEESE ROLL UPS
Let’s dive into creating this delicious Grilled Cheese Roll Ups recipe. I’ve broken down the process into simple steps, so follow along, and you’ll have a delectable meal in no time. We’re aiming for crispy exteriors with gooey cheese inside!
Flatten Your Bread Delight
Place one slice of crustless bread on a clean, flat surface. Using a rolling pin, firmly but gently roll the bread as thinly as possible, almost like a tortilla—aim for about 1/16 to 1/8 inch thick. Roll in multiple directions to ensure it’s evenly flattened. This step is crucial; if the bread isn’t thin enough, it will be difficult to roll tightly!
Assemble the Cheese Goodness
Now, place a slice of cheese (or a neat line of shredded cheese) along one edge of the flattened bread, leaving a small border (about 1/4 inch) on the sides. If you’re using optional seasonings like paprika or herbs, sprinkle them over the cheese at this point for an added flavor boost!
Butter Up the Roll-Ups
If you’re using softened butter, gently spread a thin, even layer over the entire surface of each roll-up. This keeps them beautifully golden and crisp!
Sizzle in the Skillet
Carefully place the buttered roll-ups seam-side down in a preheated skillet. You may want to cook them in batches to avoid overcrowding the pan—this keeps the temperature high for that crispy finish.
Flip for Perfection
Cook for 2-4 minutes on the first side, or until golden brown and crispy. Using tongs, gently turn them over to cook on another side. This usually takes another 1-2 minutes until all sides are perfectly golden brown and the cheese inside is gloriously melty.
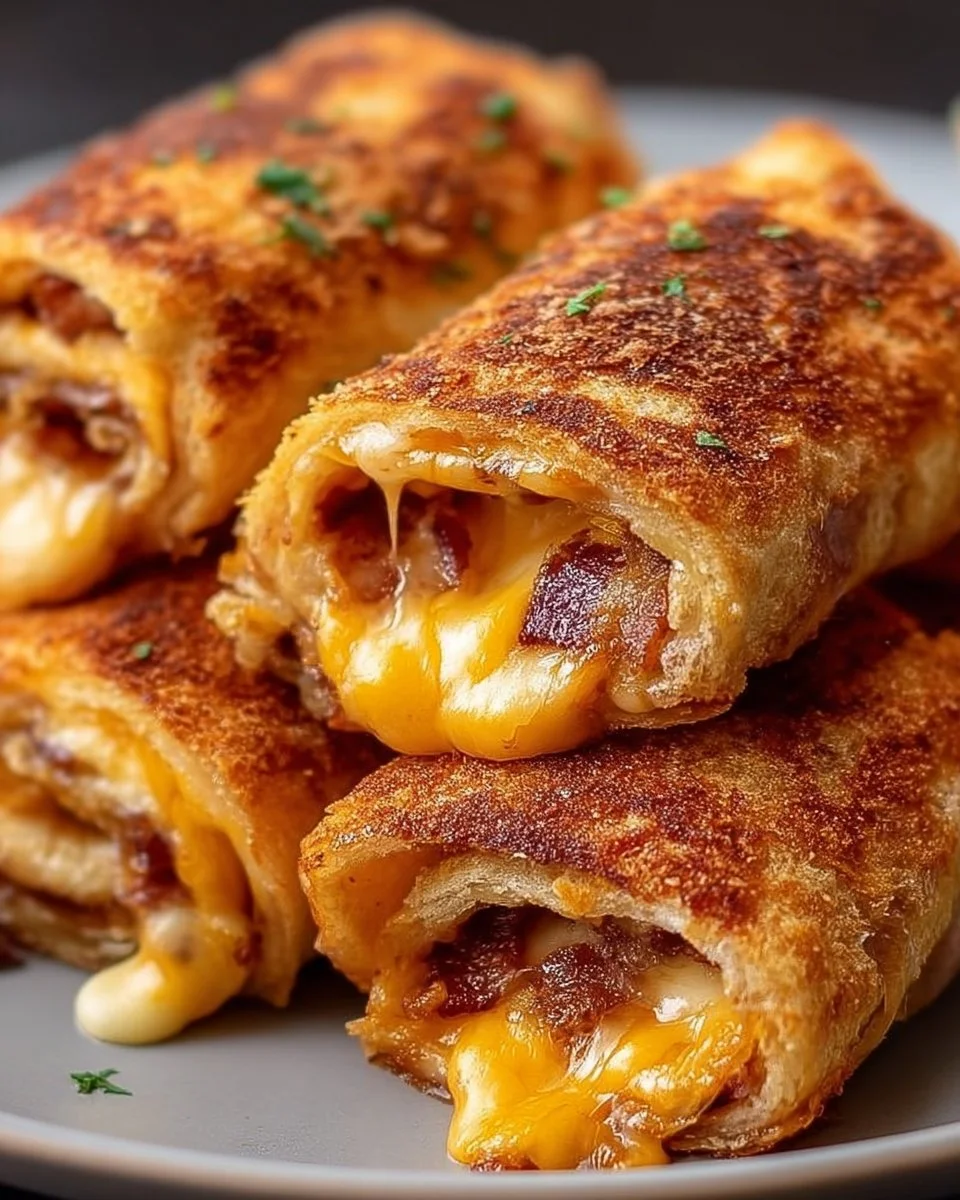
Enjoy While Hot!
It’s best to serve these Grilled Cheese Roll Ups immediately while they are hot—the bread is crispy, and the cheese is at its melty best. Don’t be surprised when they vanish off the plate in no time!
HOW TO STORE GRILLED CHEESE ROLL UPS
Leftover Grilled Cheese Roll Ups can still deliver comfort! Store them in an airtight container at room temperature for up to 2 days or in the refrigerator for about 3-4 days. If you want to keep them for longer, freeze them for up to 2-3 months. When you’re ready to indulge again, simply reheat them in a skillet over medium heat until warmed through and crispy again!
TIPS FOR SUCCESS
- Make sure to roll the bread thinly to ensure easy rolling.
- Don’t overload with cheese; too much will make rolling difficult.
- Preheat your skillet well for that perfect golden crust.
- Keep an eye on the roll-ups while cooking to avoid burning.
SERVING SUGGESTIONS
- Pair with a warm bowl of tomato soup for a classic combo.
- Serve alongside a fresh salad for a delightful crunch.
- Garnish with fresh herbs like parsley or chives for a pop of color.
- Consider a sweet dipping sauce like honey for an unexpected twist.
- Sip on a cold glass of lemonade or a hot cup of tea alongside to balance the flavors.
Enjoy these delightful Grilled Cheese Roll Ups, and share them with friends and family—you’ll create new memories, one cheesy bite at a time!